A simple and sustainable sewing project: the Fruits & Veggies Reusable Bag
When we go to the supermarket or the local market, we often take plastic bags without thinking. They’re convenient, free, and everywhere. And yet, they are used for a few minutes before being thrown away.
Not as a perfect solution, and not as a moral lesson — just as a small, practical shift in everyday life.
A simple object for everyday use
This bag is meant to be used in places where we usually rely on disposable plastic: at the supermarket, at the market, or even at home to store fruits and vegetables.
It’s lightweight, transparent enough for checkout, and easy to carry. Once folded, it takes almost no space in a tote bag or backpack.
The goal was to create something useful first — not decorative, not trendy — just functional and durable.
Why reusable bags matter in the supermarket
Plastic produce bags are designed for single use. They’re used briefly, then discarded, and often difficult to recycle due to their thinness.
Using a reusable bag doesn’t solve everything, but it does:
Reduce the number of disposable bags used over time
Encourage more conscious shopping habits
Make sustainability part of everyday routines, not a separate effort
It’s a quiet gesture, repeated often, that slowly replaces an automatic habit.
Sewing as a sustainable practice
Making this bag yourself is also part of the process.
Sewing allows us to:
Use leftover fabrics or scraps
Choose materials we trust
Create objects that are meant to last and be repaired
This pattern was designed to be simple and accessible, so it can be sewn multiple times, reused, and adapted.
The idea is not perfection, but continuity.
This bag is not designed to stay in a drawer or look good in photos. It’s meant to be carried, washed, filled, and used again and again.
I’d love to see what you make with this pattern. Feel free to share your finished bags on Instagram and tag @latelier_de_pandora — it’s always a joy to see your creations come to life.
Thank you for supporting independent design and handmade projects. Happy sewing 🤍
10 Free Crochet Patterns for Festive Christmas Decor
Christmas is just around the corner, and what better way to embrace the festive spirit than by creating your owncrochet decorations? Whether you're a seasoned crochet enthusiast or an eager beginner, we've curated a selection of 10 free patterns to help you craft beautiful ornaments for your home. Get ready to transform your house into a magical winter wonderland with these creative and fun projects!
1. Advent Calendar - Wall Hanging Tree
Kick off the Christmas countdown in style with this exquisite Advent calendar shaped like a tree for wall hanging. This innovative project blends functionality with festive décor, featuring 24 tiny pockets to conceal daily treats.
Add a personal touch to your tree with these adorable handmade Christmas baubles. This simple pattern will allow you to create unique ornaments that you can cherish year after year.
Create a warm and festive atmosphere with this charming Christmas tree garland. Perfect for decorating a fireplace, a stair railing, or even as a table centerpiece, this garland will bring a touch of magic to your interior.
The advantages of this garland:
Modular project - make it as long as you want
Ideal for using up green yarn scraps
Can be customized with small additional decorations
Difficulty level: Beginner to intermediate
Estimated time: 3-5 hours depending on desired length
Revisit the traditional Christmas stocking with this original granny square pattern. Not only will it be perfect for slipping in gifts, but it will also become a decorative piece in its own right.
What makes this project charming:
Use of the classic granny square technique
Possibility to play with different color combinations
Bring a touch of sweetness and whimsy to your decoration with this adorable crochet gingerbread house. Perfect as a tree ornament or as a decorative element on a shelf.
Add a festive touch to your moments of conviviality with these Christmas tree-shaped coasters. Practical and decorative, they will protect your furniture while bringing a warm atmosphere to your gatherings.
Holly is an essential symbol of Christmas, and this crochet square perfectly captures its essence. Use it to create cushions, blankets, or even festive placemats.
These cute little crochet wreaths are perfect for adding a festive touch to any space. Hang them on your doorknobs, use them as place cards, or give them as gifts.
What makes this project special:
Quick to make - ideal for last-minute projects
Requires little material
Possibility to customize them with different decorations
A classic Christmas decoration, the crochet candy cane will bring a touch of tradition to your decor. Hang them on the tree, use them to decorate your gifts, or create a unique garland.
The advantages of this project:
Simple but iconic shape
Perfect for using up red and white yarn scraps
Can be made in different sizes
Difficulty level: Beginner
Estimated time: 1-2 hours per candy cane
Pattern from Punto Art Design
10. Snowflake
inish your winter decoration beautifully with these delicate crochet snowflakes. Hang them on windows, on the tree, or use them to create a sparkling garland.
As we conclude this journey through festive crochet projects, I hope you've found inspiration to create your own unique Christmas decorations. Each stitch you make infuses your home with warmth, creativity, and personal touch.
Remember, crochet is more than just a craft; it's a meditative practice that can provide a peaceful respite during the often hectic holiday season. I encourage you to savor each moment spent with your yarn and hook, allowing the rhythmic motions to soothe your mind and spark your imagination.
Why not turn your crochet sessions into cherished moments? Join us at our upcoming Crochet & Knitting Party - the perfect place to celebrate the holidays in December and learn crochet in a festive atmosphere! It's an ideal opportunity to meet fellow crafters, share tips, and create beautiful decorations together.
Whether you're a beginner eager to learn or an experienced crocheter looking to share your skills, our party welcomes all levels.
You'll have the chance to work on some of the projects featured in this article, guided by friendly instructors and surrounded by holiday cheer.
Wishing you endless creativity, joyful stitching, and a holiday season filled with the love and pride that comes from creating something truly special. Happy crocheting, and may your festive season be merry, bright, and beautifully adorned with your handcrafted treasures!
I look forward to seeing you at the next Crochet & Knitting Party - where holiday magic meets the art of crochet!
Upcycling: An ecological and creative practice
In today's world, it is increasingly important to look for ways to reduce our ecological footprint. One of the methods that is gaining popularity is upcycling, also known as creative reuse. This practice, which is much more than a simple trend, is a creative movement that finds new uses for objects that we might otherwise throw away. It's an ingenious way to reduce waste, while creating unique and personalized items.
What is upcycling?
Upcycling is a process of transforming useless or unwanted materials or products into new materials or products of higher quality. In other words, it's about giving a second life to objects by transforming them into something new and useful. It's the opposite of downcycling, which is the process of converting materials or products into new materials of lesser quality.
A common example of upcycling is transforming old clothes into cushions or rugs. We can also mention the art of transforming old wooden pallets into furniture. These examples show that upcycling is not only an ingenious way to reduce waste, but also a way to create unique and personalized items.
Upcycling is also beneficial for the environment. It reduces the amount of waste that ends up in landfill sites, and it requires less energy than manufacturing new products from raw materials. It's a practice that extends the lifespan of objects and contributes to minimizing our ecological footprint.
Furthermore, upcycling promotes creativity and innovation. It allows each of us to become a creator by finding new and original ways to use the objects around us. It offers an opportunity to personalize our spaces and our lives by creating objects that have meaning and a story.
5 applications in upcycling
Upcycling can be applied in many areas of our daily life. Here are five possible applications of this ecological and creative practice:
Interior decoration: Upcycling can be used to create unique and personalized decorative objects. For example, an old photo frame can be transformed into a pretty wall shelf, or an old ladder can be reused as an original towel rack. Old glass jars can be transformed into elegant vases or candle holders. With a little imagination, you can transform almost any old object into a new decorative item for your home.
Sewing: Upcycling can also be used in the field of fashion and sewing. For example, an old shirt can be transformed into a pretty top, or worn jeans can be reused to create a trendy handbag. This not only allows you to create unique clothes, but also reduces the amount of textile waste that ends up in landfills.
3. Children: Upcycling is a great activity to do with children. Egg boxes can be transformed into boats, toilet paper rolls into racing cars, and old t-shirts into backpacks. It's a fun and educational way to teach children about the importance of recycling and preserving the environment.
4. Cooking: Even in the kitchen, upcycling can have its place. Glass yogurt pots can become spice jars, jam jars can be used to store dry foods, and eggshells can be used as seed starters. It's a way to reduce kitchen waste while creating useful and aesthetic objects.
5. Travel: Upcycling can be integrated in many ways into our travels. For example, old maps can be transformed into travel notebooks or bookmarks. Old sheets can be used to make travel laundry bags. Even old travel guides can be transformed into notebooks to document your adventures. It's a way to make your travels more sustainable and creative.
In sum, upcycling is an ecological practice that encourages creativity and sustainability. It gives a second life to objects and prevents waste, while creating something new and useful. It's a way to consume more responsibly, while demonstrating imagination and ingenuity. By adopting upcycling, we can all contribute to a more sustainable and beautiful world.
Kreadoe: My 5-day Creative Adventure
Get ready to dive into my Kreadoe adventure, a memorable event that took three months of intense preparation. Here's an in-depth look at these five days of wonder, creativity, and passion for crafts.
The Kreadoe experience
Kreadoe, for those unfamiliar with this fascinating event, is a fair dedicated to crafts and DIY. I had the amazing opportunity to participate with my own market stall selling handmade products with my dear friendPaula from Little yarn tales. It was a beautiful adventure shared with my dear friend Paula from Little Yarn Tales. In addition to our market stall, I had a space dedicated to workshops, a true haven of know-how and sharing.
Workshops: a mix of colors, threads, and flowers
With over 250 participants and 50 workshops given, the experience was simply grandiose. I had the opportunity to organize several types of workshops, each offering a unique and enriching experience: pebble painting, crochet initiation, and dried flower creation.
Pebble painting workshop
This was the first time I gave this workshop and it was a great success. Our pebble partner, Blijsteen, had provided us with beautiful little pebbles in advance. So, I was able to prepare the workshops in advance with my mom, who had come to spend three weeks in Utrecht for the occasion (she comes from the south of France). We imagined designs for the workshop, prepared the paints (especially the color mixes), and cut out the sticks that we use for dot painting.
The pebble painting workshops were held every morning from 10:00 to 11:00. However, visitors were asking us all day long if they could participate in this workshop. Given the enthusiasm for this workshop, I am already planning another workshop in January 2024, in Utrecht.
Crochet Initiation
The crochet initiation workshop was a huge success. To ensure individual attention to each participant, I had limited the session to six people.
Participants had the chance to learn the technique of crochet by creating a rectangular coaster, a perfect project for beginners. It allows understanding the basics of crochet: how to mount a chain of stitches, perform a basic crochet stitch (tight stitch), work in rows, finish the project, and cut the thread.
Participants had the chance to learn the technique of crochet by creating a rectangular coaster, a perfect project for beginners. It allows understanding the basics of crochet: how to mount a chain of stitches, perform a basic crochet stitch (tight stitch), work in rows, finish the project, and cut the thread.
Of course, it is difficult to dive deeper in a one-hour workshop. That's why I encourage all participants to continue their crochet learning at the free crochet club that I organize once a month in Utrecht, or during the crochet lessons that I offer throughout the year.
Dried Flower Workshops
Participants had the unique opportunity not only to learn but also to create their own dried flower hair clips and wreaths. This activity allowed them to add a touch of natural beauty to their daily lives, incorporating elements of nature into their creations. For the Kreadoe event, I designed a special edition of these workshops: a condensed 45-minute format, offered at half price compared to traditional workshops.
This gave participants the opportunity to select from a wide range of floral elements: flowers of various colors, pampas, eucalyptus leaves, and much more. Inevitably, the success of these workshops exceeded all my expectations. It was incredibly rewarding to see so many people actively engage and show real interest in the art of dried flowers. I am convinced that the participants will continue to create, using the techniques learned during these workshops to embellish their daily lives.
The market stall: a showcase of creativity
The fair was scattered with numerous market stalls, creating a lively and dynamic atmosphere. Our location was in the last hall, hall 7, which meant that we had to cross the entire fair every day. This gave us the opportunity to observe a multitude of market stalls offering an impressive variety of products.
Kreadoe, in particular, was a real paradise for DIY and craft enthusiasts. Everything was there, from wool to stamps, patterns, markers, paint, and DIY books. It was fascinating to see how wide the product variety was, even though most of them were not finished objects.
Paula and I had decided to focus mainly on two types of sales: handmade finished objects and DIY kits. It was a deliberate choice on our part, as we wanted to balance our offer and reach a wider audience.
Looking at the final balance, we noticed that there was not a big difference between the sales of one or the other type of product. However, if we were to look at the details, it would seem that Paula's crochet patterns were more successful in terms of quantity sold.
The experience of having a market stall at a fair is something unique. It offers exceptional visibility and we both greatly appreciated this experience. Unfortunately, I was not able to participate actively in the sale itself, as I was in charge of managing the workshops during this time. However, this experience was just as enriching and I look forward to being able to repeat it in the future.
My Review as an Exhibitor:
Despite the fatigue and long preparation, I can say without hesitation that it's really worth participating in this fair. It's an experience that I highly recommend to anyone who has a passion for crafts and DIY. The sense of community, shared enthusiasm for creation, and the opportunity to meet so many fantastic people make this event an unforgettable experience.
In summary, Kreadoe was a rewarding experience, dotted with unforgettable moments and inspiring encounters. I am looking forward to repeating the experience, and I hope to see you there next year!
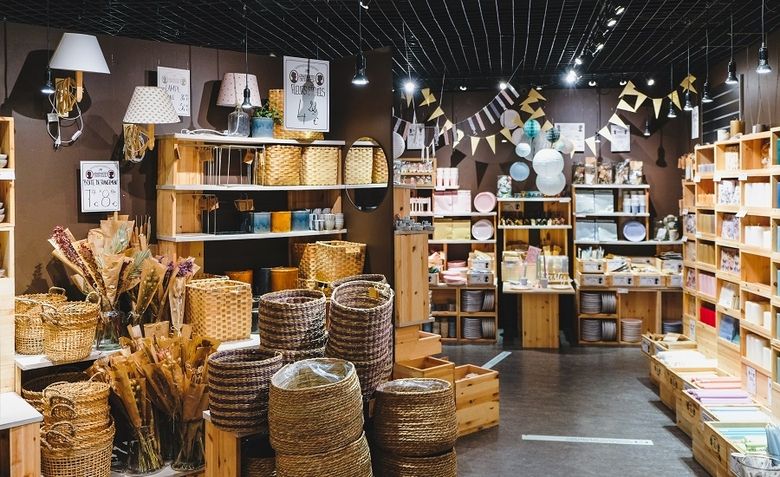
My favorite Craft stores in Utrecht
As you know crafts are my passion. This is why I strive to find the best places and websites to supply myself. I like when it is good quality but also at a good price. In this article, I will tell you my favorite places in Utrecht to shop for equipment. I hope this will help you get started in some DIY projects.
Best places for sewing materials
Ria’s fournituren: a small shop hidden in the city
A very small shop in the city center and yet very very well equipped. Ria’s fournituren is located in the alley that starts from the Vredenburg place and joins the famous Oudegracht street.
Its entrance is barely noticeable and yet the shop will provide you with almost any sewing accessory: bias binding, lining, lace, scissors, buttons…. The only item I can't find there are the sewing machine feet (only sold in stores that sell sewing machines).
The prices are reasonable and the quality is very good. If this is your first time sewing, I suggest you bring your list and stock up there. You will be very well received, with sellers who speak Dutch and English, who will be able to advise you and present you with the different options. It is also appreciable because we do not have this luxury when we buy at the, often crowded, fabric market.
Lapjesmarkt: the famous fabric market
The famous fabric market in Utrecht and the biggest in the country, the Lapjesmarkt is 400 years old now. It is held every Saturday from 9AM to 1PM on Breedstraat and Begijnhof.
You will find dozens of stands every week. From one end to the other, you will be able to supply yourself entirely for your sewing projects. They sell accessories, fabrics of all colors, all materials and all prices. The quality is there!
Some stands even sell coupons for €1 or €2. Enough to carry out beautiful projects without having to invest a lot of money. A little break on the sunny terrace of the Café De Stadsgenoot is in order, or for those in a hurry but the gourmands, it will be the opportunity to have a hot chocolate and a pastry to take away at Life's a Peach at Hardebollenstraat which is located at the half of the market.
For sewing enthusiasts, I advise you to take large bags to bring back your finds, it is sometimes difficult to resist these pretty fabrics at 2€ per meter! Go there around the 9-10 a.m. opening, to avoid the crowds and therefore long queues at each stand.
Crochet and knitting materials
Zeeman, the budget chain
This inexpensive chain store offers many possibilities when it comes to crochet or knitting. Indeed, you will find yarns varying from 1 to 5€. The value for money is quite satisfactory. Restocking is random so if you see any yarn you like, make sure you have enough to complete your project.
Sticks and cups: the little wool shop in the city center
A small shop in which you will find everything you need for your crochet or knitting projects. Quality balls of all colors and materials. On the other hand, the prices reflect the quality of this store.
Crafts of all kinds
Sostrene Grene - especially for wool, flower wreaths and paint
When you enter a Sostrene Grene shop, it’s almost impossible not to buy something! I really like this store because it is dedicated to creative arts and at a lower cost. You can find a lot of things there at a reasonable quality and a low price. I particularly like to buy yarn of wool there because they sell beautiful colors and interesting textures (Wool, Mohair). I also supply the wreaths when it comes to the flower wreaths or christmas wreaths workshops.
Pipoos
Of course the Pipoos store which is located on Oudegracht in the city center is a store 100% dedicated to crafts of all kinds. You will find anything to do any creative activity there. The prices are not very competitive, it must be admitted, but the quality is there. Although the store may seem small, it is very well stocked and has a great variety of products.
Action
Action stores are not specialized in crafts and yet they have a whole department dedicated to DIY. You will find anything you need to knit, crochet, paint, make collages, write on textiles, make bead jewelry, create personalized cards, draw, etc. All Action stores offer this crafts department. In Utrecht there are several shops, in the city center the store is located inside the Hoog Catharijn shopping center, on the Centraal train station side. The prices are really competitive. Attention they work by arrival and by season. So if you see something you like, stock up!
Floral wreaths
Intratuin, gardening store
To make the floral crowns, I advise you to buy plants from Intratuin. a rather well-known gardening store, which offers affordable solutions for decorating wreaths.
Flower market
The city's unmissable flower market, located on Place Janskerkof every Saturday from 7 a.m. to 5 p.m. Whether in summer or winter, this is where I get my plants and flowers all year round. The prices are average and the flowers are fresh and beautiful.
During the Christmas period, you can also find everything you need for fir branches and other Christmas wreath ornaments.
Enjoy your crafts shopping!
With these few store tips, I hope you will find what you are looking for for your creative projects this year. Do not hesitate to share with me your finds and your favorite stores, I am always curious to discover new places in the city.
Christmas cookies
As Christmas is this Saturday, I think you will enjoy putting yourself in a christlassy ambiance by cooking these little Christmas biscuits.
If you’ve come to one of the wreaths workshop in December you might have tried some of these… and it’s all about butter and sugar!
Ingredients
250g butter
250g sugar (brown sugar if you have is better)
2 eggs
500g flour
10g baking soda
30g vanilla sugar
5 drops of orange blossom
Instructions
Melt the butter
Mix all ingredients in a bowl, with your hands or an electric mixer.
Let it rest for 1 or 2 hours.
Flour the surface and pull out the dough. Make the little biscuits using cookie cutters to make any shape you want.
Bake in the oven for 10minutes at 210C
Let the cookies cool down for a bit. You can decorate them or just enjoy them like that!
You can store the biscuits in a metallic box or a jar for approximately 2 weeks… but you might eat them all before that
Tell me if you tried them and send me some nice pics!
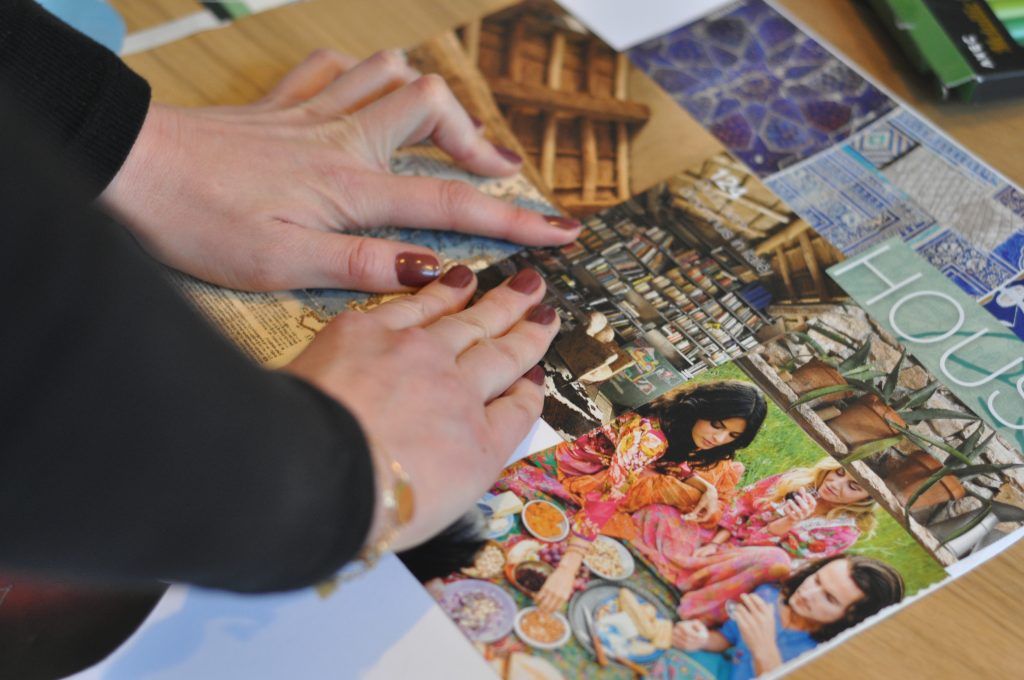
The Vision Board
What is a vision board/ a dream board?
The vision board, or dream board is, as its name suggests, a picture in which you will express your wishes, desires and you dreams for the near future.
The more precisely these are expressed, the more likely you are to see them come true. In general, we make a vision board for the year that is about to begin or for the months to come. We can put absolutely anything we want in it.
The law of attraction
The vision board is a practical exercise in the law of attraction (The more positive you think, the more positive you attract. The more negative you think, the more negative you attract). It allows us to visualize our objectives in order to achieve them. This is a collage of visuals that represent our goals.
For example, my goal is to eat healthier. I'm going to put images of healthy dishes, vegetables, fruits, but why not also healthy people on my vision board… this will increase the chances of seeing this new healthy habit appear in my life. I will draw him to me.
How to achieve it?
To make a vision board it is important to be quiet, away from everyday life or noise. Do not think too much about your vision board in advance and above all do not set limits on what you want to put in it.
to start the vision board, you can either list the things you want for the coming year for example on a sheet of paper, or simply take random magazines (and of different types) and leaf through them.
You will thus gradually cut out images or words, or even just shapes, which speak to you and attract you.
It is not necessary to always see a meaning in it, sometimes it will reveal itself during the following year!
Be careful, the more specific you are in what you put on your board, the more likely you are to attract it to you, so don't hesitate 🙂
After selecting the images and words that speak to you, you can cut them out and paste them on a large sheet. Add, if you wish, textures, paint, colors, drawings etc. Anything that seems important to you and that you want to attract to you.
Why is it important to display it at home?
Once the vision board has been created, display it in your home. It's important to put it somewhere you'll be looking at every day.
The more you look at it consciously, the more likely you are that these elements will come true. So it is not enough to take a look at it, but really to observe it for a few moments each day.
Coming to a Vision Board workshop
let yourself be carried away by the instructions to build your vision board step by step. During a 4-hour session, you will let your creativity and your dreams shine through.
I'll walk you through the process, and we'll share this sweet moment together.
You will therefore have the opportunity to create your own vision board, by making collages, drawings, writing on a large poster. You can then take it home and display it proudly in a place you come to look at every day. Throughout the following year, you will be able to see and attract these dreams to you.
During the session, you will also share this moment with the other people in the workshop. You can come and help each other if you wish, chat, eat small biscuits and drink coffee or tea. The idea is also to spend a pleasant moment of sharing that cuts you off from your daily life. It will then be easier at this time to let your desires and your dreams speak, without thinking about it too much.
Christmas is a time of year when we tend to consume a lot more than usual. Although it is often part of the magic of this season, I like to think that it is also possible to minimize our impact on the planet.
A big impact on the planet
Carbon impact
In a few figures, just over the 3-4 days around Christmas, the carbon footprint per person at 650 kg of carbon emissions. That's almost half of what we should emit in 1 year to stay on course for 2050 (during the Paris COP21 agreements in 2015, an annual carbon footprint target of 2 tons per person has been set for 2050)… In addition, this figure of 650 kg per person was revealed in a study by the Stockholm Environment Institute in 2007. We can imagine that with the explosion of the consumer society in the last 10 years, we have certainly exceeded this number to reach rather 1 ton per person.
Travel
Very often you will spend Christmas with your owns, i your family and it is completely understandable and part of the spirit of these end-of-year celebrations. This is why the Christmas period has such a significant impact on our beautiful planet. Indeed, while some will take trains and other means of public transport to join their families, most households will take their personal vehicle to get around. This will ultimately represent a very significant pollution during the holiday seasons, all over the world. Some families even travel by plane to join their loved ones at the end of December. On the other hand, given the number of journeys made by car compared to the plane, it is the use of cars that pollutes the most at Christmas, contrary to what one might think.
Food waste
The impact of the Christmas holidays on the planet in terms of food is essentially reflected in a disproportionate overabundance and considerable food waste. According to a 2019 study by the FAO (Food and Agriculture Organization of the United Nations), throughout the year, we throw away and waste almost 17% of what we produce as food in the world. In some areas this rises to almost a third, even 50%. Food losses and waste have an estimated impact on the climate of 3.3 giga tonnes of CO2 equivalent per year.
Gifts and packaging waste
The impact of the Christmas holidays on the planet is also present at the level of our garbage cans, since, each year in France and in other European countries such as Germany, we observe a 20% increase in waste at the end-of-year holiday season. In addition to food waste, the culprits are gift wrap and all cardboard and plastic packaging for gifts. Very often, the papers used are used only once and are crumpled up and then thrown in the trash. Imagine all the paper (and therefore the resources used) that we would save if everyone wrapped their gifts with recycling or reusing paper from other years. The madness of gifts and the very strong belief that "you have to give a gift and a new one" remains rooted in our society. Unfortunately, consuming only new products forces production and therefore the consumption of resources. According to a Kantar study for Ebay, in 2020, 18% of French people planned to resell the Christmas gifts that had been offered to them. According to the same study, no less than 363 million euros are spent on unwanted or unpopular gifts each year. In short, it is 1 out of 3 gifts that will be bought new but will never be used. Another waste of resources.Pay attention to the quantities this year, or just eat the left overs for a long time if you’d like, but don’t waste ! There’s always the option of giving to your invités the left overs of the big Christmas dinner, if you are not able to finish everything yourself before it gets too old.
The solutions available to you
A sustainable meal, but not in quantity
If you pay attention to the food you buy, you can mostly choose local products and vegetables that are suited to the season. You can also give an extra care in buying from local providers, seasonal products and organic veggies and fruits, and even cook a vegetarian Christmas dinner!
Pay attention to the quantities this year, or just eat the left overs for a long time if you’d like, but don’t waste ! There’s always the option of giving to your invités the left overs of the big Christmas dinner, if you are not able to finish everything yourself before it gets too old.
Buying eco friendly presents
Try as much as you can to buy eco friendly gift.
Second hand gifts: you don’t have to buy brand new things for your love ones, second hand is always an option and it’s more sustainable.
Do it yourself: you can also choose to make (#DIY) your own gifts, and it could even be personalized.
Support local businesses and handmade products: Think of how great it would be to buy a present from a local and sustainable business.
It’s a Japanese traditional wrapping cloth. It can be use to wrap a present or just transport objects. It will allow you not to use to much paper this year, and it is also part of the present. A beautiful Furoshiki is already a beautiful gift. And I will make some, only on special orders this year. You can ask me for the colors and patterns I have in stock or check out in the shop.
Avoid travelling miles
If you can, try not to travel too much for Christmas as it is part of a very big pollution. If you have to travel, prefer taking the train than the plane or the car. Think sustainability. Maybe this year you don’t need to go to see your family a cross the ocean?
What we should remember…
The impact of the Christmas holidays on the planet is huge and yet unsuspected. The most important thing is to be conscious and aware when we consume for Christmas.
It is essential to remember why we celebrate Christmas even without being religious: to rest during a break, to enjoy with family and friends, to share moments together and reunite, to create memories or to show gratitude for the past year.
These reasons are not supposed to harm the planet and the environment, they are actually opposed to it. Thus, remove all the superfluous that we added unnecessarily to Christmas, to find the pure essence of this holiday: gather with your loved ones and share a great time together.
Drying Oranges at home
Why drying oranges?
For this winter you can decorate your home with slices of citrus fruit to make in the oven. It’s easy to make, cost effective and gives a very nice sent in your home during the preparation. If you have an oven you should defenitly try it!
You can use these dehydrated slices for:
decorate your Christmas wreaths
make a 100% natural garland
decorate a potpourri in the living room
decorate your Christmas table
decorate gift packages to your loved ones
In this post I would like to tell you how I did it for the first time this year. It was really easy but I must warn you that it can take a long time to dry well. Let’s see how to make some at home…
Preparation
Tools
To make some nice orange slices you will need :
Oranges of course. Count approximately 2 oranges per cooking grill in your oven. So if you only have 2, then dont buy more than, 4 big oranges.
A very sharp knife. It is important that it is sharp otherwise you won’t be able to cut thin slices, and the drying part will take forever.
Towels or
Cooking paper
An oven that can heat at 70 to 80°C
Preheating the oven
Once you have everything in front of you, you can already preheat the oven at 75°C or 80°C. Make sure your oven stays that temperature during all the drying part. If it gets too hot, you will see your slices become brown (and we don’t want that!).
Cutting the oranges
You can start cutting the oranges in beautiful slices of approximately 3 to 4mm maximum. Make sure your knife is really sharp (and be careful not to cut any finger^^). The thinner the slices are, the easiest the drying part is gonna be. If your slices are more than 6mm, don’t use them (you can eat them right now). They will take forever to dry or will burn before they are completely dry.
Wringing the slices
Before putting the slices on the oven rack, you should wring them with a towel or paper. A big part of the juice will come out and you will save some time for the drying part in the oven. Make sure you don’t smash the slices during this procedure.
Drying in the oven
You can now put the slices on the oven rack (on a parchment/backing paper). Dispose them in one single layer, they can touch each other because they will become a bit smaller when drying.
Put them in the oven now, and keep the temperature between 70°C and 80°C.
Every 30min you will turn them upside down, so each part of the orange is dried the same way. It’s important to do so, otherwise your oranges can burn on one side.
The slices will be completely dry in 3 to 4 hours approximately, depending on the thickness of the slices, and your oven of course. Some pieces may dry quickly, in less 2 hours. Make sure that every 30min you remove the ones that are already dried.
If the oven becomes too hot, just remove the racks and let them dry a bit outside, until they completely cool down. Of course you will set your oven to a minimum temperature, or let the door open for a few minutes. Then you can put the slices back in the oven and continue the procedure (but normally this doesn’t happen if you follow the instructions).
If the oven becomes too hot, just remove the racks and let them dry a bit outside, until they completely cool down. Of course you will set your oven to a minimum temperature, or let the door open for a few minutes. Then you can put the slices back in the oven and continue the procedure (but normally this doesn’t happen if you follow the instructions).
Do not try to dry them faster by adding some degrees in the oven, it just doesn’t work.
Each time you will remove some dried slices, you can put them on a cold rack or a plate to let them cool down slowly.
How to store the dried slices
Once every slice is dried, you can let them in your kitchen during a day, to make sure they don’t stay humid or warm. Then, you can store them in a jar, a metal box, or anything that will keep them from getting dry or humid.
Of course you can use them directly for whatever you want : nice decors in your living room, setting a table for celebrations, etc.
If you have tried it please let me know I would be so happy to see it!
What sewing machine for beginners ?
1. Why buy a sewing machine?
If you think you're going to fix a few buttons and the holes in the bottom of the pockets with a sewing machine, I'll save you some money: it won't be necessary to buy a sewing machine! 😂
A sewing machine is for sewing bigger pieces such as clothes, accessories, bags, pouches, covers, bed sheets, cushion covers, furniture...
Thanks to the purchase of a sewing machine, you will be able to let your creativity speak. It will be a great weekend activity, you can go for a walk at the fabric market on Saturday morning to finally wear your new, freshly sewn dress, on Saturday evening or at Sunday brunch! 🤩
2. What are the different types of machines?
So let's start by telling you what types of sewing machines are there.
2.1. Electronic Sewing Machines
Electronic machines have a wide selection of stitches (including decorative stitches) and features thanks to a mini computer built into the machine. They are no more complicated to use than mechanical machines (older ones)! They have several motors to control the movement of the needle (sideways, forwards or backwards), which allows them to operate with a degree increased precision.
2.2. The lockmachines
These machines are used to finish the edges of fabrics to prevent them from fraying and give a more professional look to seams and hems. You will not need one to start. The zigzag stich on a classic electronic machine will do to start.
2.3. The embroiderers
These machines make it possible to do embroidery on fabric. Some do just that while others can also do the job of a sewing machine. Some sewing machines also offer an embroidery unit to add to the machine, for embroidery.
2.4. Industrial sewing machines
These are machines generally designed for a single point or a single task. For example, a quilter only sews straight stitches! The most common industrial machines are overlockers, coverlocks, stitchers, buttonhole machines... These machines are robust and efficient. Of course you will not need one for now.
3. How to choose a beginner sewing machine?
3.1. What use I will make of it?
The first question to ask is: "what use will I make of it?". If the idea is to use your sewing machine for leisure, occasionally, keep it simple. Avoid going to sewing machines that offer 30 different stitches. Quite simply, because you won't have any use for it, but also because a machine that you use using several points may quickly break down.
3.2. Robustness
This naturally brings us to the second essential criterion: robustness! A relatively heavy machine is a solid, stable and resistant machine. In summary, if you want to invest in quality equipment, avoid colorful, light machines, which offer a host of different stitches. It’s tempting, but they are not the most reliable!
3.3. Fonctionnalities
Your sewing machine must be equipped with a forward stitch, a reverse stitch and a zigzag stitch and the automatic or semi-automatic buttonhole. This is more than enough to start sewing. You can always choose a sewing machine that also offers one or two decorative stitches, but no more.
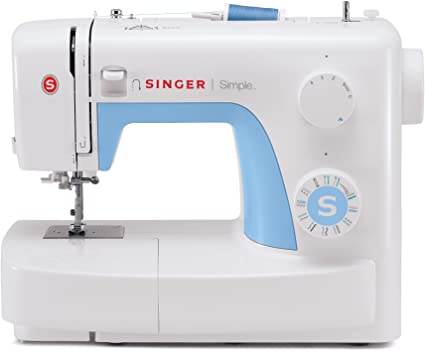
3.4. The budget
Brands like Singer or Brother are very reliable. But there’s no real “good” or “bad” brands. I think they are all good in the end. The ideal is to go to a shop to have an someone who will guide you at the time of purchase but also in case of difficulties afterwards. On the budget side, count about 150-200 euros for a quality sewing machine, corresponding to the needs of a beginner.
4. Top 5 budget models
People often ask me which sewing machine I recommend for beginners. It is always something complicated because there is not really a “cheap” sewing machine. I would say that the first prices of sewing machines are from 150€ (to have something nice), and can go up to several thousand euros of course!
So it is not at all easy to find your way around. When we want to get into sewing we always have this dilemma. Whether or not to invest in a sewing machine. We don't really know if we're going to like sewing, since we may have never tried it, or just a few times. But if you love it, then don't you want to spend 200€ on a cheap machine and have to buy a better one later?
Especially since the more expensive the machine, the more pleasant it will be to use. And contrary to what you might think, starting out on a machine that is difficult to adjust makes sewing less fun and much more difficult in the beginning.
5. The sewing machine I use every day: the PFAFF Passport 2.0
I bought this very first sewing machine in 2018. I actually started sewing in the 1900’s when I was young, with my mother's old Singer. It was with a manual sewing machine that I learned to sew, little by little. Then, during teenage, I completely stopped sewing and only resumed when I finished my studies, after my first job.
In fact, that's when I really learned to sew, and from there came my passion for sewing. I had just moved to Nantes and started as a freelancer in web communication (a job that I still do full time). I then spent half the week sewing and testing techniques, and the other half at my web agency.
I finally perfected myself thanks to youtube videos and free patterns on the internet. Something that wouldn't have been possible when I was little since we didn't even have internet! 🙈
So this famous first machine (and still current) is the passport 2.0 from the Pfaff brand. Although this is not of great importance when it comes to choosing a sewing machine, it should still be noted that the pfaff passport 2.0 sewing machine is of particular beauty. Indeed, it attracts the eye with its beautiful colors and its particular finishes. In addition, it must be admitted that it is not only beautiful to look at, it is also robust, solid and resistant to shocks!
In addition to its sleek design, the Pfaff Passport 2.0 sewing machine is also ergonomic and very light. In fact, it weighs only 6.3 kg, which makes it easy to transport (but still quite heavy I can tell you).
The Pfaff Passport 2.0 machine is sold with many accessories. Much more than necessary for a beginner, but you will end up using them some day believe me. What I prefer about this machine is its noise: it is very low.
In other words, you can easily sew your fabrics with this machine, because it is fed with great regularity above and below. This therefore makes it possible to work on all types of fabrics (thick, thin, stretchy), without folding them, and even with faux-leather. Thus, the PFAFF Passport 2 sewing machine achieves precise assembly and smooth sewing, while avoiding shifts.
To recap, here are the main features of the Pfaff Passport 2.0 sewing machine:
a lightweight for a sewing machine: 6.3 kg,
a small footprint thanks to its compact size, which allows it to be stored on a simple shelf or bookcase,
a wide choice of sewing stitches, including utility, decorative, fancy, quilt stitches and artistic stitches, the point of Paris and buttonholes;
adjustable stitch width,
the adjustable needle height, even for thick fabrics,
the possibility of working with or without pedal,
a free arm for tubular seams, such as the hems of sleeves or trouser legs, for example,
a reverse function, ideal for easily carrying out stopping points (like every sewing machine actually)
claws to practice and see how each point is rendered,
worktop lighting for visual comfort and the possibility of sewing in all light conditions, (this is quite important when you sew in a not very lightful room)
a needle threader,
possibility to adjust the stitching speed of the needle,
many accessories supplied with the machine.
I am truely happy about this sewing machine and I wouldn’t change it !!!
6. The sewing machines that are available in the Workshop
I offer sewing workshops all year round, by appointment only. the workshops aim to open you up to the world of sewing, to discover your talents, and why not, to improve your skills.
I offer projects such as making small handbags, or make-up remover wipes. You can also come with your own project, and ask me how we could work together for you to carry it out. This was the case of Virginie, who wanted to make her white dress for her civil wedding.
During these private workshops, all equipment is included! You don't need to bring your own machine, I'll lend you one. These are second-hand sewing machines, which I buy from individuals on the internet (on marktplaats or on facebook marletplace). They all work well, and are beginner machines.